카카오 오븐을 통해 간단한 자기소개 페이지를 만들어봤습니다.
일단 자기소개 페이지만 간단하게 만들고 추후 제이쿼리와 자바스크립트로 꾸밀 예정입니다.

html를 만들기 위해서 visual studio code에서 새 파일 만들기 한 후 이름. html로 저장합니다.
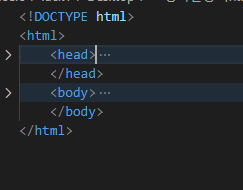
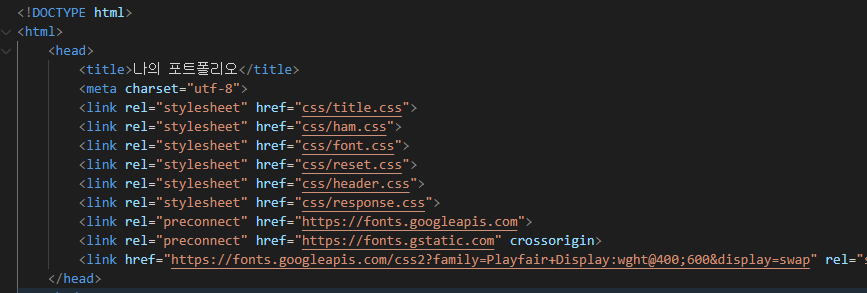
head에는 제목, 아이콘, css 파일연결, js 등등 연결하고 사용자에게는 보여지지 않는 메타데이터만 있습니다.
css는 하나로 묶는 것 보다는 header, title, footer, ham 등 나눠서 저장하는 것이 좋습니다. (나중에 재사용 가능)
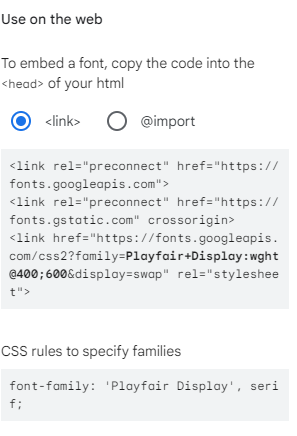
구글 폰트 사용하기
Google Fonts
Making the web more beautiful, fast, and open through great typography
fonts.google.com
구글 폰트 사이트에 들어가서 원하는 폰트를 선택한 후 link는 head에 쓰고 CSS는 font.css를 만든 후 입력하면 됩니다.

body
사용자에게 보여지는 최상위 콘텐츠입니다.
대부분 header, title, main, footer 등등 만듭니다.
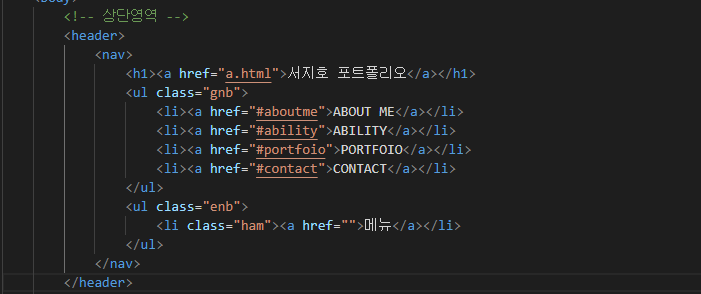
header 상단 영역

header{

    position: fixed;
    width: 100%;
    z-index: 1;

}
header nav{
    display: flex;
    justify-content: space-around;
    padding: 20px;
    border-bottom: 1px solid #ccc;
}
header h1{

    width: 10%;
}
header h1 a{
  text-indent: -9999px;
  display: inline-block;
  background-image: url(../img/logo.png);
  background-size: 37%;
  background-repeat: no-repeat;
  background-position: center;
  height: 55px;
  width: 100%;
}
header ul.gnb li:hover a{
    border-bottom: 1px solid #ccc;

}
header h1:hover a{


}
header ul{


}
header ul.gnb{
    display: flex;
    width: 70%;
}
header ul.gnb li{


    margin: 20px auto;
    line-height: 1.5;
    font-size: 15px;
    color: #fff;

}
header ul.gnb li a{

}

header ul.enb{

    width: 10%;
    margin: 20px 0;
}
header ul.end li{

}
header ul.end li a{

}
로고는 html에서는 로고의 이름만 주고 나서 css로 통해 로고를 넣었습니다.
z-index : 번호;
위치 지정요소와 그 자손 또는 하위 플렉스 아이템의 z 줄 순서를 지정합니다.
더 큰 x-index 값을 가진 요소가 작은 값의 요소 위를 덮습니다.
* position이 있을 때만 사용이 가능합니다.
https://developer.mozilla.org/ko/docs/Web/CSS/z-index
z-index - CSS: Cascading Style Sheets | MDN
CSS z-index 속성은 위치 지정 요소와, 그 자손 또는 하위 플렉스 아이템의 Z축 순서를 지정합니다. 더 큰 z-index 값을 가진 요소가 작은 값의 요소 위를 덮습니다.
developer.mozilla.org
:hover
보통 사용자의 커서가 요소 위에 올라가 있으면 선택됩니다.
그래서 상단 메뉴 요소 위에 올라가면 boder-bottom: 1px soild #ccc를 주어 밑줄이 나타나게 했습니다.
https://developer.mozilla.org/ko/docs/Web/CSS/:hover
:hover - CSS: Cascading Style Sheets | MDN
:hover CSS 의사 클래스는 사용자가 포인팅 장치를 사용해 상호작용 중인 요소를 선택합니다. 보통 사용자의 커서(마우스 포인터)가 요소 위에 올라가 있으면 선택됩니다.
developer.mozilla.org
메뉴바 CSS 만들기
@charset "UTF-8";:
/* 햄버거 */
.ham{
  width: 20px;
  height: 2px;
  display: block;
}

.ham::before{
  content: "";
  width: 20px;
  height: 2px;
  border-top: 3px solid black;
  display: block;
  cursor: pointer;
  padding-top: 3px;

}

.ham::after{
  content: "";
  width: 20px;
  height: 2px;
  border-bottom: 3px solid black;
  display: block;
  cursor: pointer;
  padding-bottom: 3px;
}

header .enb li.ham a{
  text-indent: -9999px;
  display: block;
  background-color: black;
  height: 2px;
  width: 20px;
  padding: 0;

}

header ul.enb li.ham{
  text-indent: -9999px;
  display: block;
  background-color: black;
  height: 2px;
  width: 20px;
  padding: 0;

}
타이틀 만들기


#title{
  width: 1200px;
  margin: 0 auto;
  height: 100%;
}
#title{
  position: relative;
}
#title div.myPhoto{
  position: absolute;
  left: calc((1200px - 260px) / 2);
  top: calc((100% - 450px) / 2);
}
#title div.myPhoto ul.subphto{

}
#title div.myPhoto ul.subphto li{

}

#title div.myPhoto ul.subphto li figure img{

  width: 260px;
  height: 350px;
  position: absolute;
  left: 20px;
  z-index: 1;
}
#title div.myPhoto ul.subphto li figure img{


}

#title div.myPhoto ul.subphto li figure::before{

  content: "Fornt-end";
  position: absolute;
  text-orientation: upright;
  writing-mode: vertical-lr;
  font-size:27px;
   height: 330px;
}
#title div.myPhoto ul.subphto li figure::after{

   content: "Developer";
   top:360px;
   left: 20px;
   font-size: 27px;
   position: absolute;
}

#title div.backbox{
  display: block;
  background-color: #ccc;
  width: 155px;
  height: 240px;
  position: absolute;
  left: 193px;
  top: 139px;
  z-index: 0;
}
#title div.backbox::before{

    content: "";
    width: 20px;
    height: 2px;
    border-top: 3px solid black;
    display: block;
    cursor: pointer;
    padding-top: 3px;
}
#title div.backbox ul.sns{

  display: flex;
  flex-direction: column;
  float: right;
}
#title div.backbox ul.sns li{


  margin: 20px 17px;
}
#title div.backbox ul.sns li:nth-last-child(1){
  position: absolute;
  left: 145px;
  top: 179px;
}
#title div.backbox ul.sns li a{

}
#title div.backbox ul.sns li a img{
  display: block;
  width: 35px;
  height: 35px;
}
#title div.sidetext{

}
#title div.sidetext p{

}
#title div.sidetext img{

}
figure
사진 옆에 글을 넣고 싶었기 때문에 figure를 사용해 ::after :: before를 사용했습니다.
독립적인 콘텐츠 표현합니다.
figcaption을 넣어서 설명을 덧 붙일 수 있습니다.
https://developer.mozilla.org/ko/docs/Web/HTML/Element/figure
<figure> - HTML: Hypertext Markup Language | MDN
HTML <figure> 요소는 독립적인 콘텐츠를 표현합니다. <figcaption> 요소를 사용해 설명을 붙일 수 있습니다. 피규어, 설명, 콘텐츠는 하나의 단위로 참조됩니다.
developer.mozilla.org
calc
CSS 함수를 사용하면 CSS 속성의 값으로 계산식을 지정할 수 있습니다
그래서 저는 calc를 이용해 위치 조정을 했습니다.
https://developer.mozilla.org/ko/docs/Web/CSS/calc
calc() - CSS: Cascading Style Sheets | MDN
calc() CSS 함수를 사용하면 CSS 속성의 값으로 계산식을 지정할 수 있습니다. <length>, <frequency>, <angle>, <time>, <percentage>, <number>, 또는 <integer>를 받는 속성의 값으로 사용할 수 있습니다.
developer.mozilla.org
vertical-lr
블록의 표시 방향은 왼쪽에서 오른쪽입니다. 문장은 수직으로 표시됩니다.
https://developer.mozilla.org/ko/docs/Learn/CSS/Building_blocks/Handling_different_text_directions
텍스트 표시 방향 제어하기 - Web 개발 학습하기 | MDN
CSS 학습에서 지금까지 경험한 많은 속성과 값은 화면의 크기와 연결되어 있습니다. 예를 들어, 박스의 위, 오른쪽, 아래쪽 및 왼쪽에 테두리를 만듭니다. 이러한 실제 측정 기준은 가로로 표시되
developer.mozilla.org
'웹페이지' 카테고리의 다른 글
| 탭 메뉴 만들기 (1) | 2022.11.27 |
|---|---|
| 로그인 UI 만들기 (0) | 2022.11.20 |
| block, inline, position 완벽 정복 (0) | 2022.11.06 |
| container (0) | 2022.11.06 |
| item (0) | 2022.11.06 |